Skip to content Skip to footer

How to Replace a Car Headliner Fabric

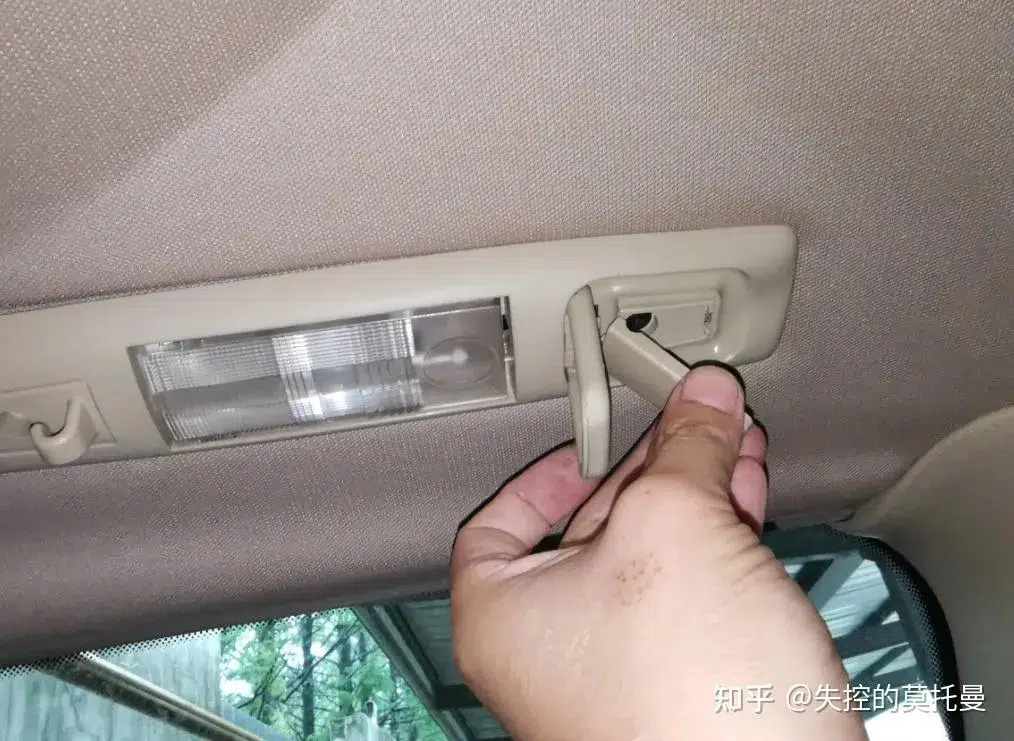
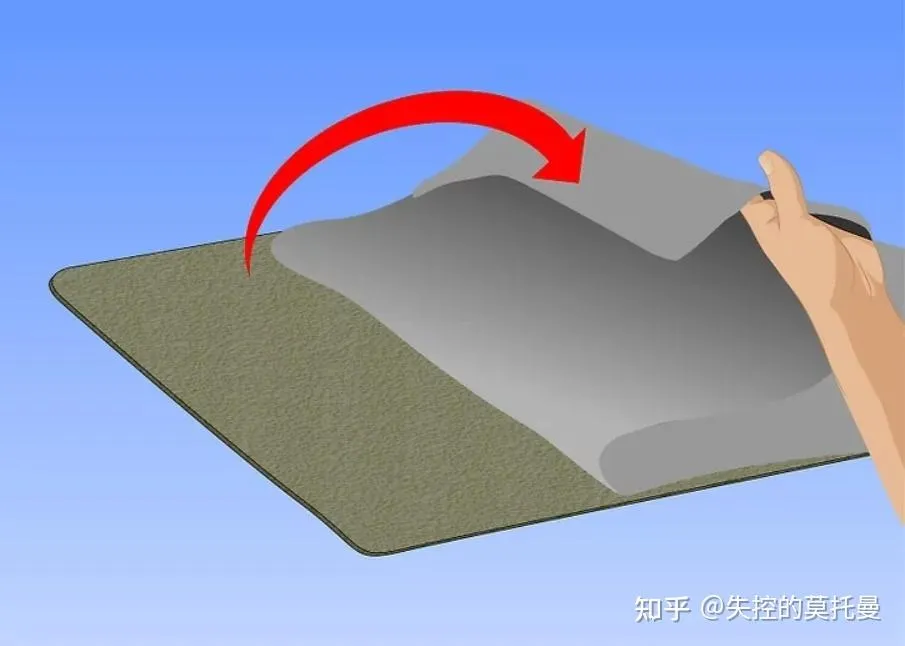
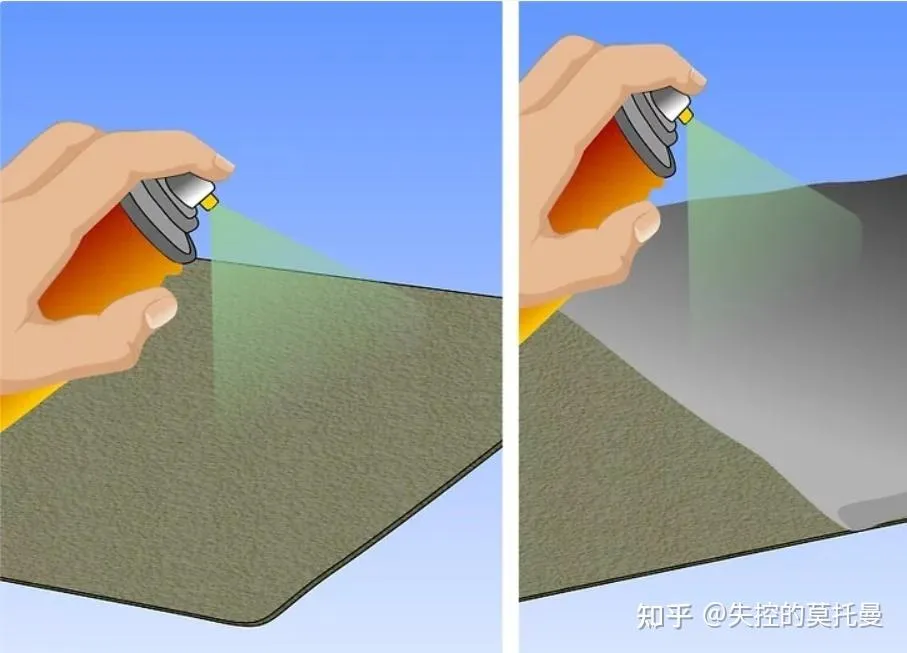
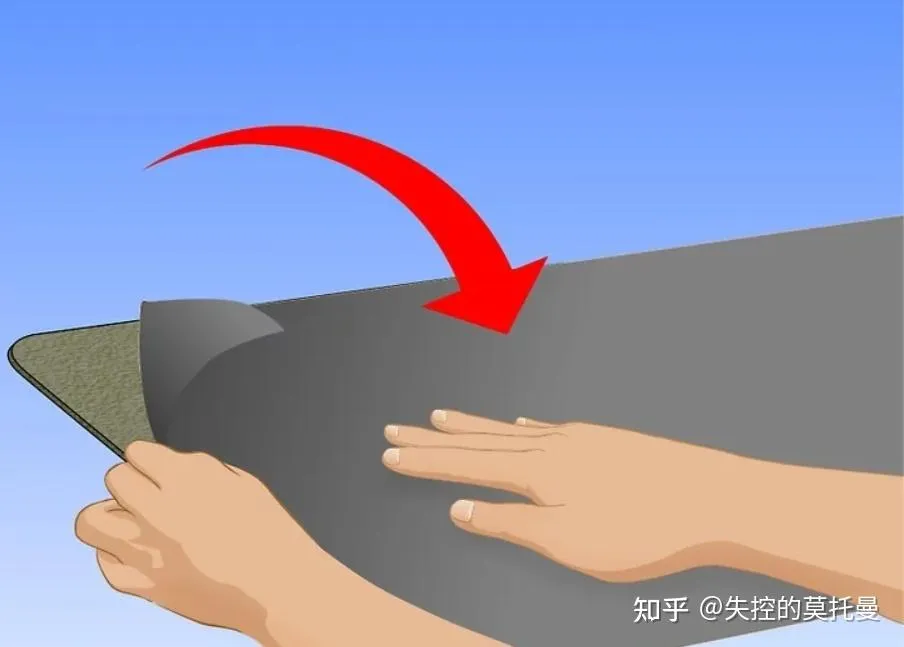
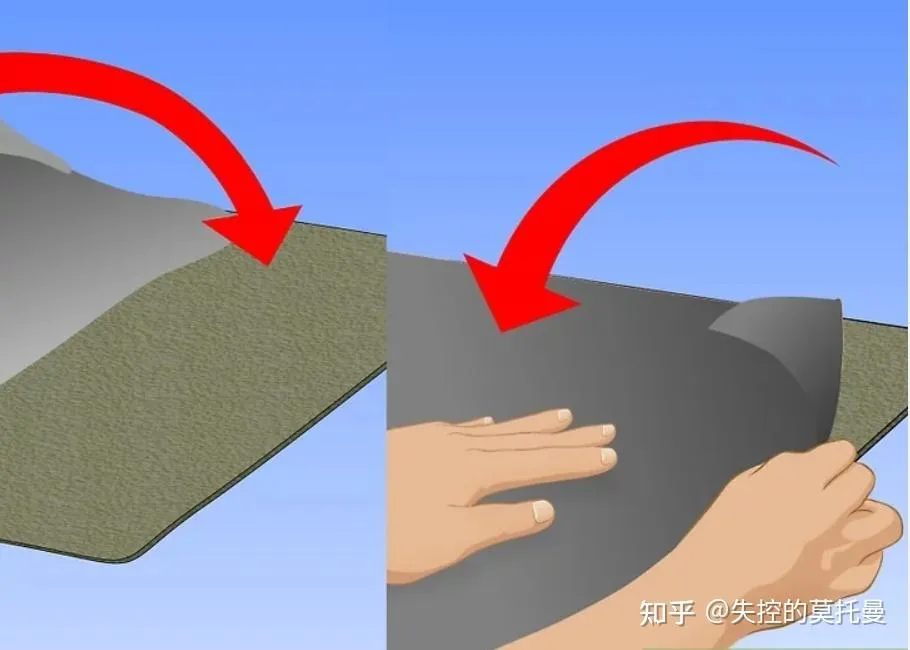
The car headliner is a foam-backed fabric covering adhered to the vehicle’s ceiling. If the headliner is exposed to excessive moisture or if the car is an older model, the foam layer of the car headliner fabric can oxidize and hydrolyze, causing it to loosen and sag. You don’t need to hire a professional to fix a drooping or dirty headliner. You can replace it yourself by following these steps on how to install a new headliner.

Step 1 Remove the Old Headliner

  • Pry off all trim pieces surrounding the headliner and secure them in place.
  • Remove and set aside all seatbelt covers, lights, speakers, visors, and brackets. You may also need to detach some upper panels on the A, B, and C pillars to allow the headliner to drop from the roof area. Some bolts may need to be unscrewed, and some parts may require prying with a flathead or Phillips screwdriver.
  • Release any clips holding the headliner board in place.
  • Slide the headliner board out of the vehicle and place it on a flat work surface—a large table or the floor will work.
  • Peel off the old fabric from the headliner board; it should come off easily if deteriorated.
How to Replace a Car Headliner Fabric

Step 2 Scrape Off Residual Foam

Use a stiff brush or light-grit sandpaper to remove any remaining foam from the headliner board. Be gentle to avoid damaging the substrate. The smoother the surface, the better your finished headliner replacement will look.
Scrape Off Residual Foam

Step 3 Lay Out the Replacement Headliner Fabric

Spread the new headliner fabric over the board, smoothing out any wrinkles or creases.

Step 4 Fold the Fabric in Half

Fold the fabric in half, leaving half of the headliner board exposed.
Fold the Fabric in Half

Step 5 Prepare Both Surfaces for Adhesion

Apply adhesive (such as 3M spray adhesive) to both the underside of the headliner fabric and the headliner board. Choose a high-temperature-resistant glue, as the interior roof can get very hot in summer, and standard adhesives may fail under heat, causing the fabric to detach again.
Prepare Both Surfaces for Adhesion

Step 6 Press the Fabric Onto the Board

Lay the glued fabric onto the board, pressing it into place with your palms as you go. Pay extra attention to concave areas like grab handles, ensuring a tight fit. Avoid stretching the fabric too tightly to prevent rebound bulges.

Step 7 Repeat the Process for the Other Half

Fold back the unglued half of the fabric, then repeat the gluing, stretching, and pressing process for the remaining section.

Step 8 Allow the Adhesive to Dry

Let the glue fully cure. You can speed up drying by leaving it in the sun for a while.

Step 9 Cut Openings for Fixtures

Make holes in the headliner for lights, seatbelts, visors, and coat hooks. Add any new configurations as needed.

Step 10 Trim Excess Fabric

Before reinstalling the headliner board, trim any excess fabric, leaving about 2-3 cm of extra material around the edges for wrapping during installation.

Step 11 Reinstall the Headliner Board

  • Position the headliner board back into the car.
  • Wrap the excess fabric around the edges for a clean finish.
  • Secure the headliner using the car’s original clips (if applicable).

Step 12 Reattach Trim and Accessories

Reinstall all previously removed trim pieces and accessories. Your car headliner replacement is now complete!

Translated from Author: Ai Lean
Source: Zhihu

This article is only for the use of learning exchanges, reproduced please specify the blog link source

Leave a comment

0.0/5